Hello firends Today, we’re makingBeautiful Fruit Jelly Cheesecake Recipe with Dragon Fruit and Banana It’s an easy and tasty recipe that anyone can try. Perfect for any meal, this dish is sure to be a hit. Let’s get cooking. Get ready to enjoy makingBeautiful Fruit Jelly Cheesecake Recipe with Dragon Fruit and Banana a simple, delicious dish perfect for any occasion. Let’s dive in and start cooking.
Ingredients:
For the Banana Cake Base:
- 1 cup (240 ml) mashed ripe bananas (about 2 medium bananas)
- 1 cup (200 g) granulated sugar
- 1/2 cup (115 g) unsalted butter, softened
- 2 large eggs
- 1 1/2 cups (190 g) all-purpose flour
- 1 1/2 tsp baking powder
- 1/2 tsp baking soda
- 1/4 tsp salt
- 1/2 cup (120 ml) buttermilk or milk
- 1 tsp vanilla extract
For the Banana Cheesecake Filling:
- 16 oz (450 g) cream cheese, softened
- 1/2 cup (100 g) granulated sugar
- 1 cup (240 ml) plain yogurt
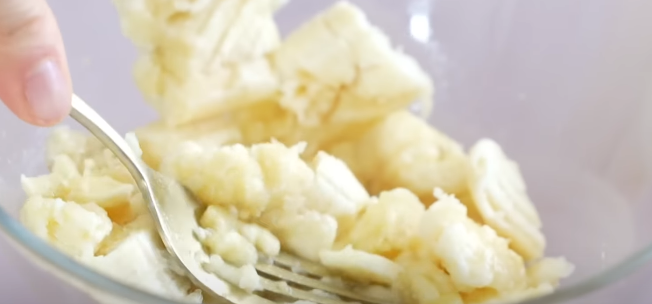
- 1 cup (240 ml) mashed banana
- 1/4 cup (60 ml) lemon juice
- 1 tbsp gelatin powder (pre-soaked in 1/4 cup water and then melted)
- 1 cup (240 ml) heavy cream, whipped to 50% volume
For the Dragon Fruit Jelly Topping:
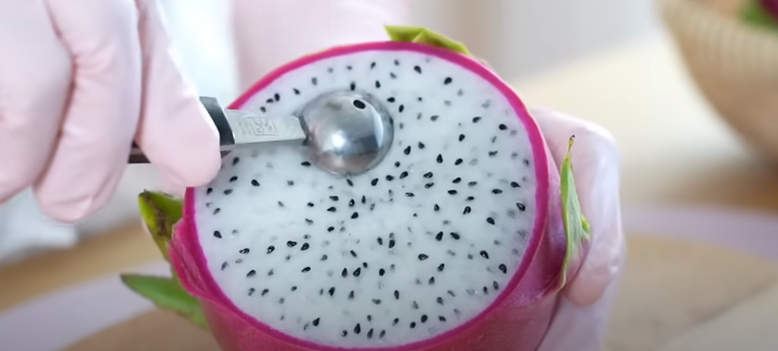
- 1 cup (240 ml) red dragon fruit juice (from red dragon fruit)
- 1/2 cup (120 ml) water
- 1/4 cup (50 g) granulated sugar
- 2 tsp gelatin powder
For the Lemon Jelly:
- 1/2 cup (120 ml) lemon juice
- 1/4 cup (50 g) granulated sugar
- 2 tsp gelatin powder (pre-soaked in 1/4 cup water and then melted)
- 1/2 cup (120 ml) hot water (about 65°C/149°F)
For the Graham Cracker Crust:
- 1 cup (100 g) graham cracker crumbs
- 1/4 cup (50 g) granulated sugar
- 1/4 cup (60 g) melted unsalted butter

Instructions:
1. Prepare the Banana Cake Base:
- Preheat your oven to 350°F (175°C). Grease and flour an 8-inch (20 cm) round cake pan.
- In a medium bowl, whisk together flour, baking powder, baking soda, and salt.
- In a large bowl, cream together the softened butter and sugar until light and fluffy.
- Beat in the eggs one at a time, then add the mashed bananas and vanilla extract.
- Gradually add the dry ingredients to the banana mixture, alternating with the buttermilk, beginning and ending with the flour mixture. Mix until just combined.
- Pour the batter into the prepared cake pan and smooth the top.
- Bake for 25-30 minutes, or until a toothpick inserted into the center comes out clean.
- Let the cake cool completely in the pan before transferring to a wire rack.
2. Prepare the Banana Cheesecake Filling:
- In a large bowl, beat the cream cheese until smooth.
- Add the sugar and beat until creamy and combined.
- Mix in the yogurt and mashed banana.
- Stir in the lemon juice.
- Melt the soaked gelatin and mix it into the cheesecake mixture.
- Gently fold in the whipped cream.
- Pour the cheesecake filling over the cooled banana cake in the pan.

3. Prepare the Graham Cracker Crust:
- Mix graham cracker crumbs, sugar, and melted butter until well combined.
- Press the mixture into the bottom of the cheesecake pan.
- Refrigerate for 30 minutes to set.
4. Prepare the Dragon Fruit Jelly Topping:
- In a saucepan, heat the dragon fruit juice and sugar over medium heat until the sugar dissolves.
- Remove from heat and stir in the dissolved gelatin.
- Allow the mixture to cool slightly before pouring over the cheesecake.
5. Prepare the Lemon Jelly:
- In a small bowl, dissolve the gelatin in hot water and let it sit for 15 minutes.
- Mix in the lemon juice and sugar.
- Cool the mixture to room temperature before adding it to the cheesecake.
6. Assemble the Cheesecake:
- Pour the cooled dragon fruit jelly mixture over the cheesecake filling.
- Place in the refrigerator and chill for at least 2 hours or until the jelly is fully set.
- Prepare the lemon jelly as instructed and pour it over the set dragon fruit jelly.
- Refrigerate for an additional 2 hours or until fully set.
7. Serve:
- Carefully remove the cheesecake from the pan.
- Garnish with fresh dragon fruit slices, mint leaves, or edible flowers if desired.
- Slice and enjoy!

Your cheesecake looks like a work of art with those beautiful layers and vibrant colors. I’m sure it tastes as fantastic as it looks! Thanks for sharing this delightful recipe. 🍰✨
